Note: The instructions described here applies to openIMIS version 1.3.0 and later. You will need Visual Studio to change update the language resource files and to publish the updated version.
Web Application .Net is supporting up to two languages. The language translation is done on the Web Application source code level (this page) and on the database level (see WA4.1 Language selection and translation tables).
The Web Application language localisation is using the default ASP.Net Globalization and Culture configuration. The translation is based on resource files. The generic application is translated into English-language and French-language.
![]()
In order to facilitate the translation of the Web Application and to have a common repository for language packs for openIMIS, we have subscribed to lokalise.com. If you wish to add new languages to openIMIS Web Application, you can request the access by visiting the Web Application project on lokalise. For more information on the translation platform please check Translation Management platform page.
Add a new language for Web Application in lokalise
- Add new language to the project
- From the Web Application project press the
+button to add a new language
- From the
Add languagesmodal select the language to add. You can filter the languages by writing in the input field. In this example, we will choose French (Cameroon). Multiple languages can be added at once.
- Click the Add button.
- From the Web Application project press the
- Translate the glossary to the new language
- From the Web Application project press the
Glossarybutton to add a new language
- For each glossary term, translate in the new added language

- From the Web Application project press the
- Translate the Web Application into the new language
- For each term in the Web Application project, translate it in the new language

- For each term in the Web Application project, translate it in the new language
- Export the language as resource file
- From the Web Application project press the
Downloadbutton
- Select the language you want to download and the different download settings
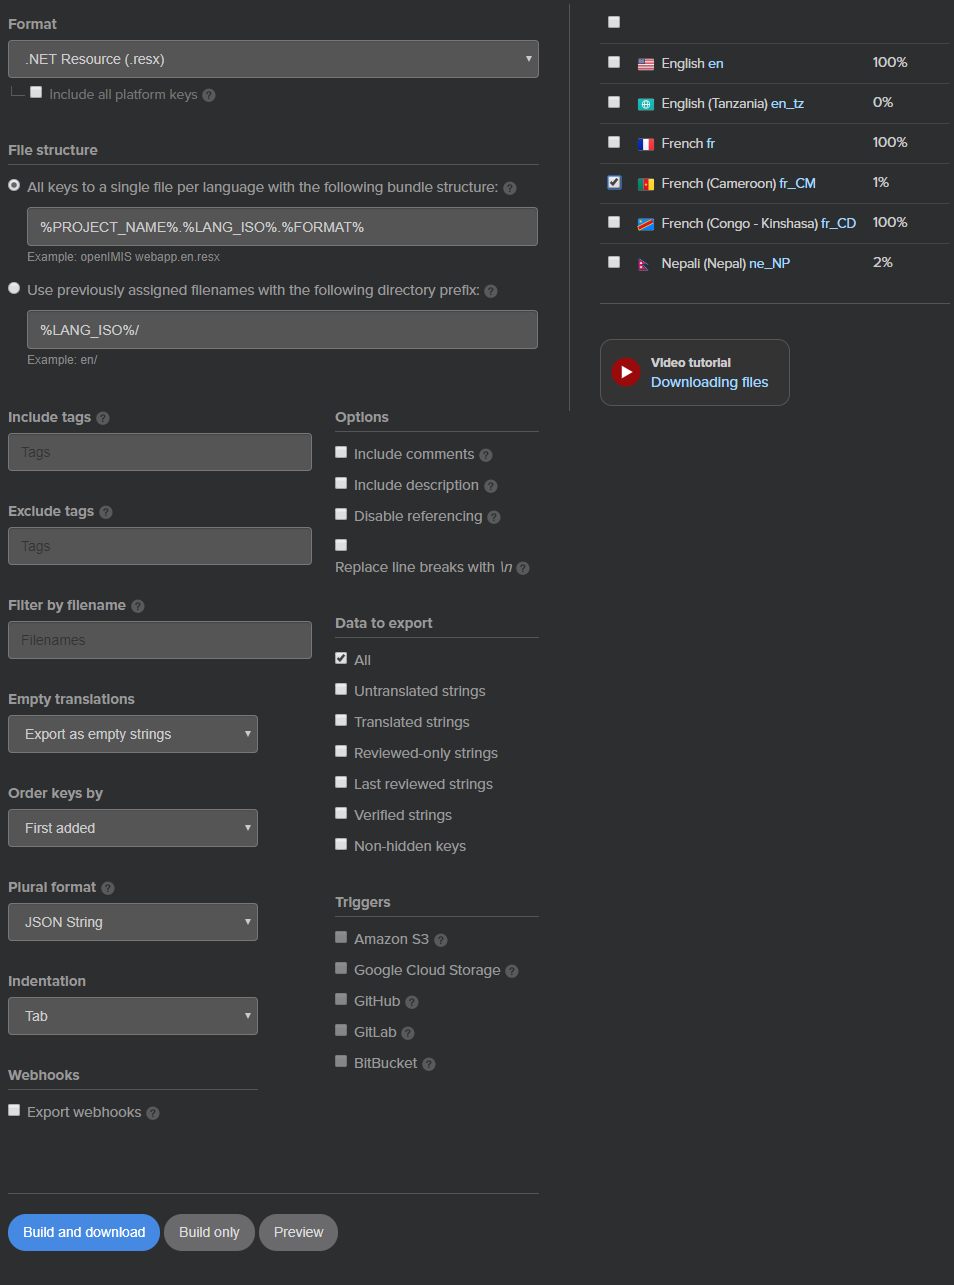
- Press
Build and downloadbutton. This will download a ZIP file with resource files for all selected languages. Unzip
- From the Web Application project press the
Add the new language in the Web Application project
- Open the Web Application .Net solution downloaded from Github
- In the
Solution Explorerwindow, navigate toIMIS project→App_GlobalResourcesfolder and open the contextual menu with right-click - Select
Add → Existing Item... - Select the resource file for the new language and press
Add.This will copy the file to the App_GlobalResources folder and add it to the project. - (Optional) you can check the new language by opening the resource file.
To use the new language, the Web Application .Net solution needs to be published and deployed. Don't forget to update language selection and translation tables in the database.
The goal of this page is to give an example of the different organization name you can have in Chad to illustrate how it is important to adapt openIMIS to the country-specific names validated by the country because sometimes there is multiple truth
Also, it is often complex and can change over time:
| openIMIS default name | TCHAD Official old name | TCHAD Official new name | TCHAD Health zones | Note |
|---|---|---|---|---|
| Regions | Région | Province | Délégation Sanitaire Provinciale | |
| District | Prefecture | Département | District sanitaires | Multiple "districts" or "délégation sanitaires" can be regrouped in a "Province" |
| Municipality | Sous-préfecture | Commune | Zone de résponsabilité | Multiple "Canton" can be regrouped in a "Commune"; chief of Canton is a traditional chief |
| Village | Village | Village | Village | Chief of "Village" is a traditional chief, also called Férik. Multiple Villages can be covered by a single "Aire de santé" |